Tag: GitHub trending

  • shadcn/improve: Free AI Code Audit Skill

    shadcn/improve: Free AI Code Audit Skill

    There’s a quiet tax on using AI to write code, and it isn’t the subscription. It’s that the model smart enough to understand your codebase is also the most expensive one to run — so every fix, every refactor, every small change gets billed at the top rate. shadcn/improve, a free agent skill from the creator of shadcn/ui, is built on a simple inversion of that problem: let the expensive model do the thinking once, and let the cheap models do the typing. It’s sitting at #4 on GitHub trending today, up 333 stars in a day to 10,454 total, and it’s one of the most practical AI dev tools to trend in a while — because the idea is obvious the moment you hear it, and the execution is more careful than the idea suggests.

    The plan is the product

    The tagline on the repo says it plainly: “Use your most capable model to audit your codebase and write plans for cheaper models to execute.” That’s the whole tool. You install it with npx skills add shadcn/improve, and it works in any agent that supports the Agent Skills format. Run /improve and the skill audits your codebase — nine categories, from correctness and security to performance, test coverage, tech debt, dependencies, developer experience, docs, and direction — with every finding carrying file-and-line evidence, an impact rating, an effort rating, and a confidence rating. Then it vets its own findings: an advisor pass re-reads every cited location, drops the false positives, and records the rejections. Then it prioritises by leverage — impact divided by effort, weighted by confidence — and writes one plan file per finding into a plans/ folder, plus an index with the recommended order.

    The key design decision is what the skill refuses to do. It never modifies source code itself. The only files it writes are the plans. It never runs commands that mutate your working tree — read, search, and read-only analysis only. And it never reproduces secret values: it records locations and credential types, and recommends rotation. If you ask it to implement something, it declines and points at the plan. The plan is the product, and the product is a markdown file any agent — or a human — can pick up and follow.

    That matters because the pitch only works if the plans are good enough for a weak model to execute. The skill is designed around that: every plan is self-contained, with all context inlined — file paths, code excerpts, conventions, verified build, test, and lint commands — and every step ends with a command and an expected output, a machine-checkable definition of done. There are explicit out-of-scope lists and stop conditions instead of letting a small model improvise, and each plan stamps the git commit it was written against, so drift can be checked mechanically later.

    Eleven commands, one workflow

    The skill ships with eleven commands, and they map to a workflow that feels like a small team rather than a single prompt. /improve runs the full audit. /improve quick does a cheap pass over hotspots and top findings only. /improve deep is exhaustive — every package, every category. /improve security runs a focused security audit, and there are focused variants for performance, tests, and bugs. /improve branch audits only what the current branch changes. /improve next suggests features. /improve plan <description> skips the audit and specs one thing directly. /improve review-plan <file> critiques and tightens an existing plan. /improve execute <plan> dispatches a cheaper model in an isolated git worktree, reviews its diff against the plan, and reports a verdict — approve, send back for up to two rounds, or block and refine. Merging always stays your call. And /improve reconcile refreshes the backlog next session: it verifies done plans, investigates blocked ones, refreshes drifted plans, and retires fixed findings. Add --issues and plans get published as GitHub issues with the same self-contained body.
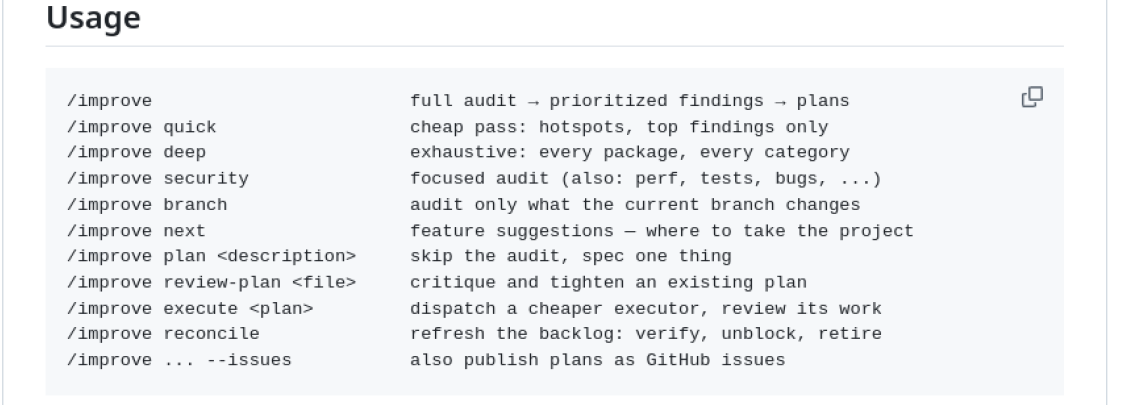
    Screenshot of the shadcn/improve README usage section
    Screenshot: github.com/shadcn/improve

    The worked example in the README is a run against shadcn/ui itself, and it’s worth reading for what it shows about the vetting step. The audit found a shadow-config duplicated across search.ts and view.ts, with the copies already drifted — tech debt, medium effort, high confidence — and an O(n²) icon migration in migrate-icons.ts:168 — performance, small effort, high confidence. It also rejected a finding, with the reason recorded: an https_proxy environment variable flagged as an SSRF risk was by design, a standard proxy convention every CLI honours. That’s the kind of false positive that erodes trust in automated audits, and the skill’s answer is to show its working and its rejections rather than hide them.

    What it costs, and the honest caveat

    The skill itself is free — MIT licensed, installed with one command, no subscription, no API key required by the skill itself. It runs inside whatever AI coding agent you already use, so you pay that agent’s normal usage. The real cost is model usage: the audit runs on your most capable, usually most expensive, model, and execution runs on cheaper ones. That trade only saves money if your cheap executor is actually cheaper than running the strong model for everything — which is true in most setups, since the price gap between frontier and mid-tier models is large — and the plans still need human review before merging. The skill is explicit that merging stays your decision, and that the executor’s work gets reviewed against the plan before it comes back to you.

    There’s a second caveat worth stating plainly: none of this has been independently benchmarked. The claim that the plans are executable by “the weakest plausible executor,” the claim that vetting drops false positives, the nine categories and the leverage ordering — all of that is the project’s own description of its design, not a third-party test. No independent review was found in this research pass. The repo is also young in a specific way: created June 10, 2026, 23 commits, zero releases, last commit two months ago, five open issues, twelve open pull requests. That’s normal for a skill repo — it’s a small set of files, not a product with a release train — but it means you’re adopting one person’s workflow, not a maintained platform. The author is shadcn, whose shadcn/ui component library is one of the most widely used in the React world, which is presumably why the repo has 10,454 stars and 427 forks despite being a single skill.

    Don’t confuse it with Google Skills

    If you read corei10.com regularly, you may remember Google Skills, the 186-skill catalog for Google Cloud we covered on November 6. Same “agent skills” theme, different thing entirely. Google Skills is a catalog — a library of skills you pick from, each one teaching an agent how to do a specific cloud task. improve is a single workflow skill: audit a codebase, write plans, hand them to cheaper models. You could, in principle, use both — one to run your cloud, one to clean up the code that runs on it — but they solve different problems, and improve is the one with the money-saving pitch. If you’re already using Claude Duet or Muse Spark Open for agentic work, improve slots into the same stack: the agent does the thinking, the plan does the talking, and the cheaper model does the typing.

    Who should try it

    The audience is narrow and that’s fine: developers with a codebase they actually work in, using an AI coding agent that supports the Agent Skills format. If that’s you, the install is one command and the first run costs you one audit on your best model. Start with /improve quick rather than the full audit — it’s the cheap pass, and it’ll tell you within minutes whether the findings are worth anything for your code. If the findings are mostly noise, you’ve spent one audit. If they’re real — duplicated config, an O(n²) loop hiding in a migration script, a security flag that’s actually by design — then the plans folder starts paying for itself, because every plan is a piece of work a cheaper model can now do without re-reading your whole codebase. That’s the bet: pay once for understanding, and never pay for it again.

    Also today: November Pixel Drop: Pixel Tag, Gemini & More and Ring Drone Cam: $250 Flying Camera Ships Jan 27.
  • Astryx: Meta’s Free Agent-Ready Design System

    Astryx: Meta’s Free Agent-Ready Design System

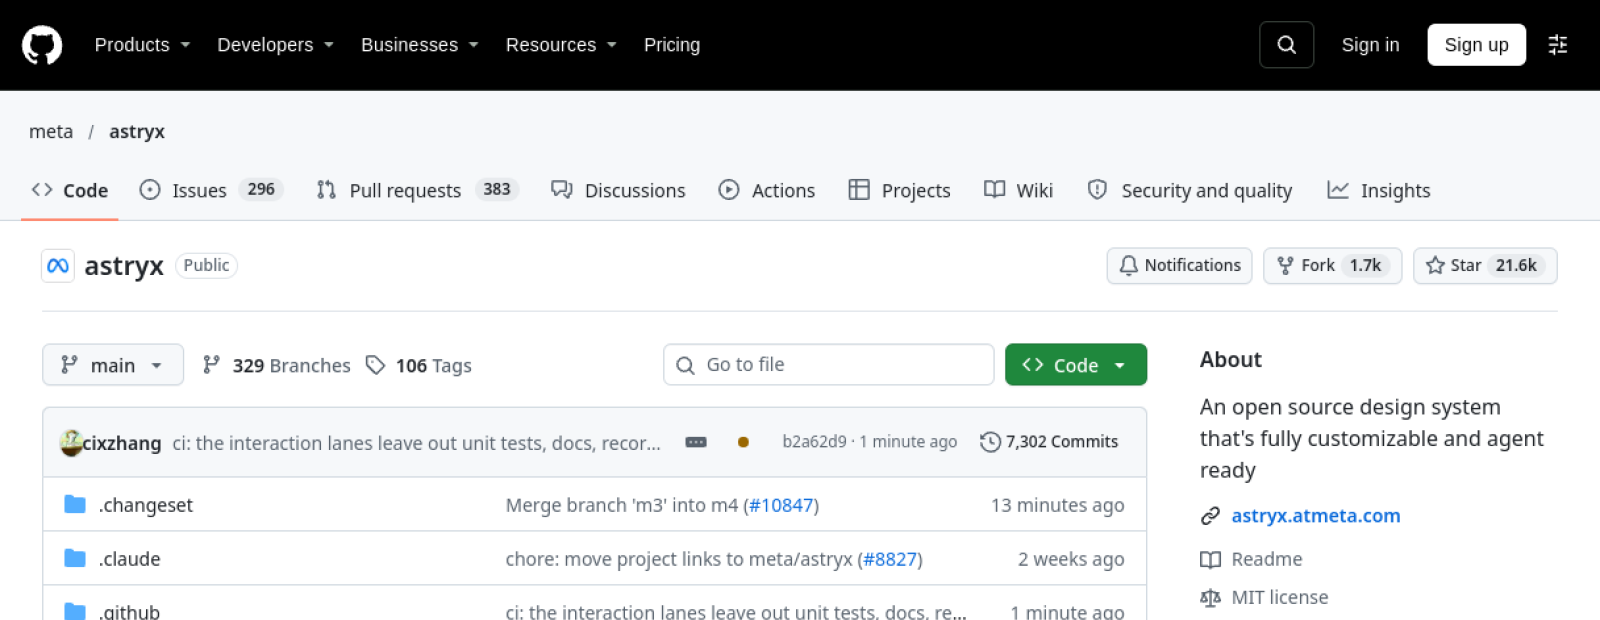
    The most-starred repository on GitHub today is not a new AI model, a game, or a viral utility. It is a design system — the kit of buttons, forms, tables, and themes that developers use to build interfaces — and it comes from Meta. Astryx picked up more than 3,100 stars in a single day to reach the top of GitHub's trending list, with about 21,600 stars in total and nearly 1,700 forks.

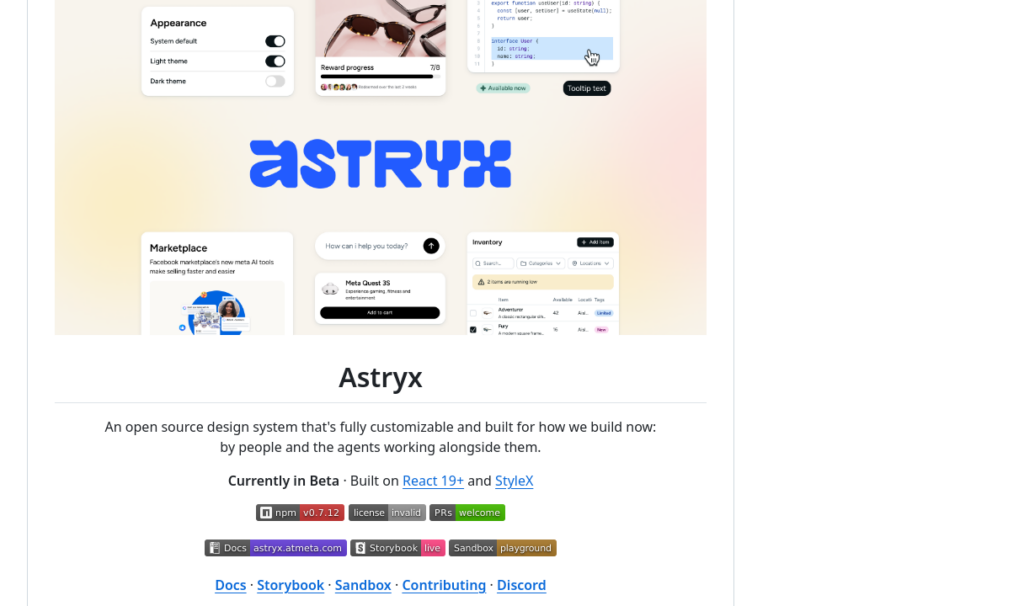
    That is an unusual thing for a design system to do. Design systems are infrastructure: necessary, unglamorous, and usually invisible to anyone who is not building a product. Astryx is trending for a specific reason, and it is written into the project's own description: "An open source design system that's fully customizable and agent ready." The agent part is doing the work. This is a component library built for a world where the person writing the interface might be an AI assistant — and Meta is giving it away for free under the MIT license.

    Eight years inside Meta, now on GitHub

    Astryx did not start as an open-source project. It grew inside Meta over the last eight years, where it became the company's most-used and largest design system, powering more than 13,000 apps. That is the kind of pedigree that matters for a design system, because these tools are only as good as the pressure they have survived. A component library that has served 13,000 internal apps has been argued over, broken, fixed, and refined by the engineers, designers, and product teams who depend on it every day.

    The project has been public since January 9, 2026, and it is actively developed: 7,302 commits, 48 releases, 106 tags, with the latest release, v0.7.12, landing about an hour before this article was written. It is, however, still in beta — a label the README carries prominently, and the first of several honest caveats worth keeping in mind.

    What you get is a system, not a pile of components. It ships more than 150 accessible components, brand-level theming, dark mode, ready-to-ship templates, and a command-line tool, all as one cohesive package. You import pre-built CSS and use typed React components. There is no build plugin to install, no styling library to adopt, no PostCSS or Babel configuration to wrestle with. The simplest setup is a few CSS imports plus a theme provider.

    What makes it different

    Most design systems make you a deal: use our components our way, or fight the system. Astryx's README lists four things it does differently, and each one is aimed at that bargain.

    First, open internals. Components are built to be composed at any level, not locked behind a closed top-level API. The building blocks you would reach for are exported directly, and when you need to go deeper, a feature called swizzle ejects a component's full source into your project so you own it. That is the opposite of the usual black-box component, and it is the feature most likely to win over experienced React developers who have been burned by a library that would not let them change one small thing.

    Second, no styling lock-in. Astryx authors its styles with StyleX, Meta's styling library — but that is invisible to consumers. You override with className using Tailwind, CSS modules, or plain CSS, whatever your project already uses. You do not have to adopt StyleX to use Astryx, which removes the biggest reason developers usually say no to a new design system.

    Third, customize without wrapping. A theme is a set of CSS custom property overrides, so a designer can make Astryx unmistakably theirs without forking or wrapping component source. Seven ready-made themes ship with it — neutral, butter, chocolate, matcha, stone, gothic, and y2k — and each is fully customizable.

    Fourth, and the one the project leads with: built for people and agents. The API, the docs, and the CLI are designed together so a person and an AI assistant build the same way, from the same reference. The repository even ships with AGENTS.md and CLAUDE.md files at its root — the machine-readable instructions that tell a coding agent how the project works. The README's phrasing is blunt: "Every change that made Astryx easier for AI made it easier for people too."

    The agent-ready part is the point

    That last claim is the reason Astryx is trending now rather than at any point in the last ten months. AI coding agents have become the way a lot of software gets built, and agents are only as good as the systems they build with. A design system with inconsistent naming, undocumented props, and components that behave differently from each other is a minefield for an agent — and, to be fair, for a human too. Astryx's answer is strong, documented conventions: every component follows the same naming, prop, and composition rules, and every one is thoroughly documented, so once you have learned a few, the rest feel familiar, and both people and AI can predict how an unfamiliar component behaves.

    The CLI is the other half of the agent story. It is not just a scaffolding tool; it gives component docs, templates, scaffolding, themes, and codemods from the command line, and it can be installed globally so that astryx works in any folder and every coding agent knows Astryx. The README recommends installing it both globally and per-project, and even includes a package.json script workaround so AI assistants invoking the CLI directly do not hit path errors. That is the level of detail you only write when you have watched agents trip over your tooling in production.

    There is also a docsite, a live Storybook, and an interactive Sandbox, all linked from the README, plus a Discord server for questions and contributions. The project is, in other words, set up to be used, not just starred.

    Installing it in about five minutes

    Astryx requires React 19 or later — react and react-dom are peer dependencies of @astryxdesign/core — so the first check is whether your project is already there. If it is, installation is three packages:

    
    npm install @astryxdesign/core @astryxdesign/theme-neutral @stylexjs/stylex
    npm install -D @astryxdesign/cli
    

    The same commands exist for pnpm and yarn. The CLI can also be installed once globally with npm i -g @astryxdesign/cli, which is the recommended route if you want every coding agent on your machine to know Astryx. After that, astryx docs answers questions about global versus project installs, and npm run astryx -- component --list shows what is available. The core package's README covers the full guide for Next.js, Tailwind, Vite, and CDN setups.

    The cost is nothing. The system is MIT-licensed, the packages are on npm, and there is no paid tier, no account, and no API key. The only real costs are the ones that come with any design system: learning its conventions, and committing your interface to its components.

    The honest caveats

    Astryx is in beta, and beta means the API can still change. If you build a production product on it today, you should expect breaking changes and budget time for upgrades. The chart components tell the same story in miniature: @astryxdesign/vega and @astryxdesign/charts are published to npm only under the @canary dist-tag, with no stable release yet, and the experimental @astryxdesign/lab package is not published at all.

    The React 19 requirement is a real constraint too. Plenty of production apps are still on React 18, and upgrading a framework version to adopt a design system is a decision, not a chore. And the Meta pedigree cuts both ways: a system built to serve 13,000 apps inside one company is battle-tested, but it is also opinionated in ways that reflect Meta's needs. The "guidance over enforcement" principle — components give you capability rather than guardrails that fight you — is the project's answer to that, and it is a good one. But the proof is in using it, not in reading the README.

    None of that dims the reason to try it. A free, MIT-licensed design system with 150-plus components, seven themes, a CLI that speaks to AI agents, and eight years of production use inside one of the world's largest software companies is a serious offer. That it is trending on GitHub today, above every AI model and dev tool on the list, says something about where the work has moved: the bottleneck in building software is no longer the model. It is the interface. Astryx is Meta's answer to that, and now it is everyone's.

    Astryx README banner with component screenshots, the Astryx logo, and links to docs, Storybook, and Sandbox
    Screenshot: github.com/meta/astryx

    Screenshot: github.com/meta/astryx


    Also today: Claude Fable 5.2: 20% Cheaper, 30% Faster — and a Twin You Can't Have and PlayStation Portal Player: Sony's Japan-Only Handheld, With Storage It Won't Explain.

    Related: Google Skills: 186 Free Agent Skills for Google Cloud · Agent-Browser: The CLI That Gives AI Agents a Browser · Sherlock: Find Any Username Across 400+ Sites, Free

  • Sherlock: Find Any Username Across 400+ Sites, Free

    Sherlock: Find Any Username Across 400+ Sites, Free

    Sherlock: Find Any Username Across 400+ Sites, Free

    Type a username into Sherlock and, a few seconds later, you get a list of every corner of the internet where that name exists. GitHub, Reddit, Spotify, YouTube, Chess.com, Ko-fi, Trello, Snapchat — more than 400 sites in total, checked one by one, with a link to each profile it finds.

    It is the kind of tool that sounds like it should cost money, require an account, or live behind a sales page. It is none of those things. Sherlock is free, open source, MIT-licensed, and it runs from your own terminal. That combination is why it is having a moment: the project picked up more than 4,200 stars in a single day this week, landing at number three on GitHub’s trending list, with over 106,000 stars in total.

    What it actually does

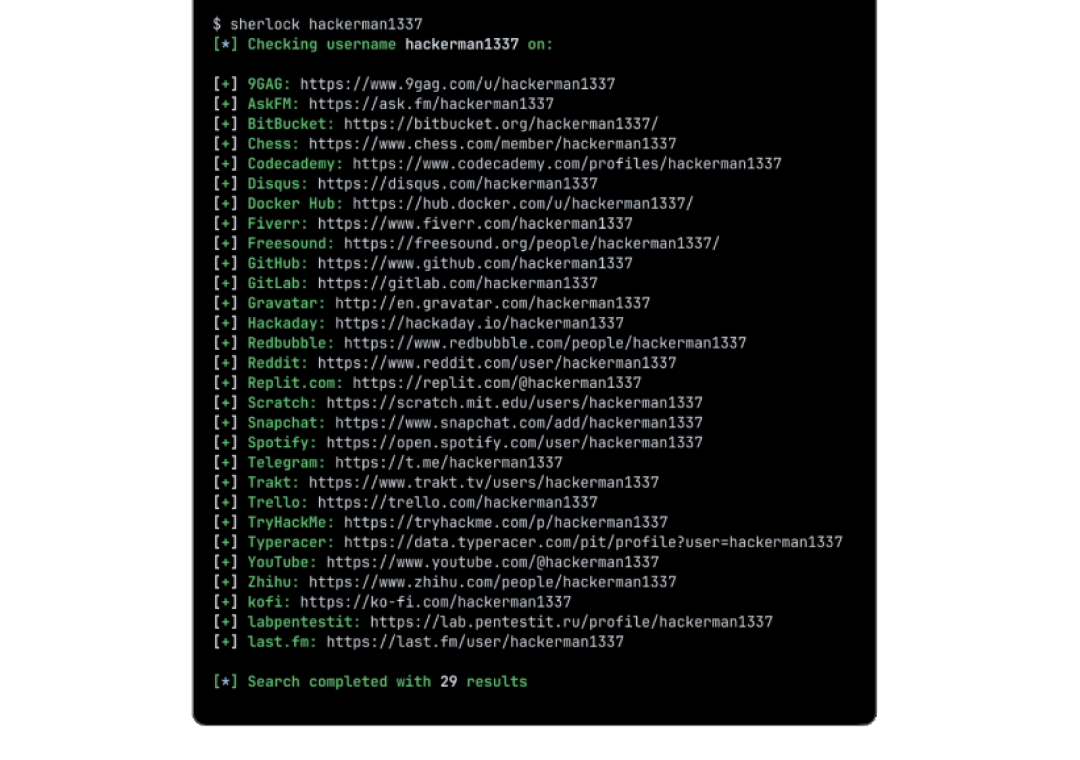
    Sherlock takes a username and checks it against a list of over 400 social networks and websites, then reports back with the profile URLs where that name is taken. The project’s own demo — one command, sherlock hackerman1337 — returns 29 results, from 9GAG to last.fm, each one a live link you can open.

    Sherlock terminal demo checking the username hackerman1337 across social networks
    Screenshot: github.com/sherlock-project/sherlock

    The results land in two places: printed in the terminal as they are found, and saved to a plain text file named after the username, so you can keep a record without copy-pasting. Feed it several usernames at once and it works through all of them. Add --csv or --xlsx and the output becomes a spreadsheet instead; --json gives you structured data for piping into other tools. --browse opens every result in your default browser, which is either convenient or overwhelming depending on how common the username is.

    There is a quiet detail in the options list that tells you how seriously the project takes accuracy: --print-all shows every site checked, including the misses, while --print-found shows only the hits. The default is the hits. And there is an --nsfw flag that is off by default — the adult sites in the list are excluded unless you explicitly ask for them.

    Who it is for

    The obvious audience is OSINT — open-source intelligence — the journalists, researchers, and security professionals who need to know whether the same handle shows up on a forum, a code host, and a marketplace. A username is one of the few identifiers people reuse everywhere, and Sherlock exploits that habit in the open: it only checks public profile pages. It does not log in to anything, bypass any security, or access private data. If a profile is public, Sherlock can find it. If it is not, it cannot.

    But the audience is wider than that, and more ordinary. Checking whether your own handle is taken before you commit to it on a new platform. Seeing how much of your digital footprint shares a single username. A small business checking whether a brand name is already in use across the sites that matter. A parent checking what a teenager’s gaming handle turns up. All of those are legitimate uses of exactly the same feature, and none of them require any technical knowledge beyond opening a terminal.

    That is also why the tool comes with a responsibility the README does not spell out. Finding someone’s public profiles is not the same as having a right to use what you find. Sherlock will happily hand you the links; what you do with them — contacting someone, scraping their posts, building a dossier — is on you. A lookup is not a license.

    Installing it takes about a minute

    The recommended route is pipx, Python’s tool for installing command-line apps in their own isolated environment:

    pipx install sherlock-project

    If you prefer containers, the Docker route is one command — docker run -it --rm sherlock/sherlock — and there is a dnf install sherlock-project option on Fedora-based systems. Community-maintained packages exist for Debian 13 and later, Ubuntu 22.10 and later, Homebrew, Kali, and BlackArch, though the project notes those are not directly supported or maintained by the Sherlock team.

    One warning from the README is worth heeding before you install on Linux: packages for ParrotOS and Ubuntu 24.04, maintained by a third party, appear to be broken, and users of those systems are told to use pipx, pip, or Docker instead. It is a small thing, but it is the kind of honest maintenance note that tells you a project is actively looked after rather than abandoned — and the commit history backs that up, with nearly 3,000 commits and 284 contributors, the most recent changes landing within the last week.

    The current release is v0.16.2, and the project is written almost entirely in Python — 97.3% of the codebase — which means anyone with basic Python knowledge can read the site list, add a site, or fix a broken check. That openness is part of the point: the list of 400-plus sites is a community-maintained file, and it only stays accurate because people keep updating it as sites change their profile URLs.

    The honest limits

    Sherlock is a lookup tool, not a search engine, and its limits are the kind that matter once you start relying on it.

    First, a hit is not a confirmation. If a username exists on a site, Sherlock reports it — but it cannot tell you whether the account belongs to the person you are looking for. Common names produce false positives by design; “john” exists on nearly every site on the list, and none of those profiles is necessarily the same John. The tool finds names. Identity is still your job.

    Second, sites change. A platform that redesigns its profile pages or starts blocking automated checks will quietly stop returning results until someone updates the site definition. The project’s test suite and contributor base keep this mostly in check, but a result list is always a snapshot of what the tool could verify on that day, not a guarantee.

    Third, speed depends on the network. Sherlock checks sites one at a time with a default 60-second timeout per request, and a full run across 400 sites takes a while — minutes, not seconds, on a slow connection. There are options to narrow the list to specific sites, which is the practical answer if you only care about a dozen platforms.

    And fourth, the obvious one: Sherlock only finds what is public. A private account, a deleted profile, or a username that was never registered simply does not show up, and the tool will not tell you why. Absence of a result is not evidence of absence.

    Why it is trending now

    Sherlock is not new — it has been accumulating stars since 2018, and its star history shows a steady climb rather than a single viral spike. What today looks like is a rediscovery: AI-agent tooling dominates GitHub trending this week, and Sherlock is the kind of small, sharp, do-one-thing-well utility that agent builders keep reaching for. It does one job, it does it from the command line, and its output is a plain list of URLs — exactly the shape of result an agent, or a human, can use immediately.

    That is probably the best way to think about it. Not as a hacking tool, and not as a surveillance product, but as a very fast way to answer a very simple question: where does this username live? Try it on your own handle first. The results might surprise you — and that, more than anything, is the point.

    Screenshot: github.com/sherlock-project/sherlock


    Also today: NVIDIA Stock Falls as Board Probes Jensen Huang and Claude Personal Finance: Link Your Bank to Claude — and What It Can’t Do.

    Related: Google Skills: 186 Free Agent Skills for Google Cloud · Agent-Browser: The CLI That Gives AI Agents a Browser · Cloudflare Security Audit Skill: Free AI Code Auditor

  • Agent-Browser: The CLI That Gives AI Agents a Browser

    Agent-Browser: The CLI That Gives AI Agents a Browser

    What it actually does, in one loop

    Your coding agent writes a web page. Then what? Until now, the usual answer was: you open the browser yourself, click around, and report back what you saw. Vercel Labs’ agent-browser, trending on GitHub today with about 47,000 stars, exists to close that loop — it gives an AI agent a browser it can drive one shell command at a time, so the agent can check its own work.

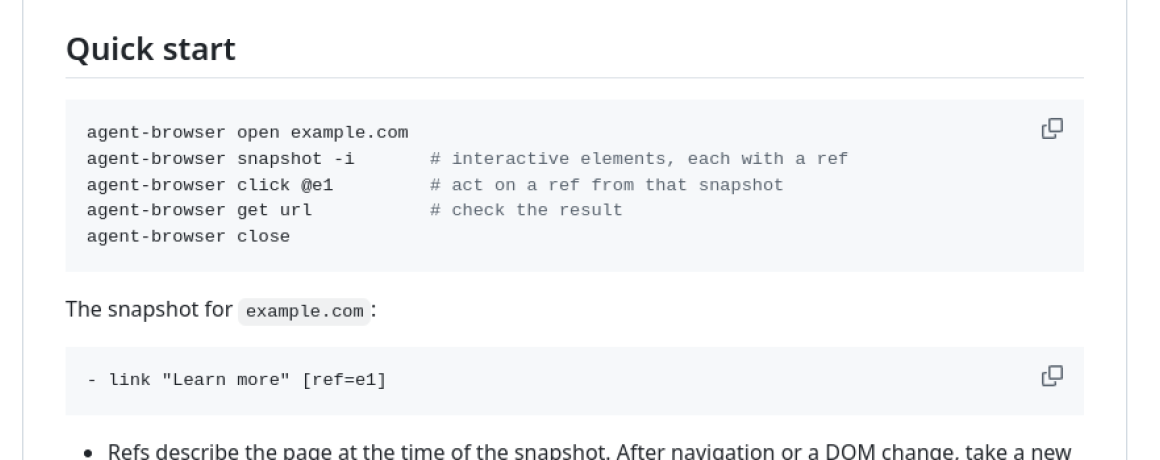
    The loop is deliberately simple. The agent opens a page, takes a snapshot — a compact text version of the page’s accessibility tree, with each element tagged with a reference like @e1 — acts on a reference with click @e1, then re-reads the page and repeats. The browser stays open between commands, so the agent keeps its place. When the page changes, the references go stale, and the agent takes a fresh snapshot. That’s the whole idea, and the whole point: a browser reduced to something an agent can reason about in text.

    It’s a native Rust CLI, created in January 2026 and now at version 0.41.2, released November 3. It works with Claude Code, Cursor, GitHub Copilot, OpenAI Codex, Google Gemini, opencode, and, per its docs, “any agent that can run shell commands.” That last phrase is doing a lot of work — it means there’s no plugin to install in your editor and no MCP server to configure before the first command. If your agent can run a shell command, it can drive a browser.

    Two commands and your agent has a browser

    Installation is the part that usually kills developer tools, and here it’s genuinely short:

    vercel-labs/agent-browser README Quick start commands and snapshot output
    Screenshot: github.com/vercel-labs-agent-browser — the README’s Quick start loop.

    npm install -g agent-browser
    agent-browser install

    The second command downloads Chrome for Testing the first time you run it. Homebrew users can install with brew install agent-browser instead, and you can try it without installing anything via npx agent-browser open example.com. On Linux, agent-browser install --with-deps also pulls in the browser’s system libraries. No API key, no extra browser to install, no account. The CLI is free and open source under Apache 2.0, and running browser commands locally doesn’t require any model subscription — the cost is whatever your agent already costs you.

    One thing worth correcting before it trips anyone up: some secondary write-ups list Node.js 24+, pnpm 11+, and Rust as requirements. They aren’t — those are only needed if you’re building the tool from source. A normal install needs npm or Homebrew and nothing else. The CLI auto-detects an existing Chrome, Brave, or Playwright/Puppeteer install if you have one, and can attach to a running Chrome via CDP, use the Lightpanda or Obscura engines, drive Mobile Safari in the iOS Simulator, or hand off to cloud browser providers like Browserbase or Browserless — which charge their own rates and need their own keys.

    Beyond the basic loop, there are more than 50 commands: navigation and reading, clicking and typing and scrolling, waiting, screenshots, PDFs, video recording, cookies and storage, network interception and mocking, tabs and frames, console and error inspection, React and Web Vitals tooling, and sessions with an auth vault. It can run an MCP server with agent-browser mcp — 29 tools in the default core profile, 156 with --tools all — and it ships version-matched agent skills you can install with npx skills add vercel-labs/agent-browser. Headless is the default; the daemon closes a headless browser after an hour without commands, while headed browsers are exempt from the timeout.

    Why it took off

    The number that explains the star count is a token count. A snapshot runs about 200–400 tokens, against roughly 3,000–5,000 for a full DOM dump — that’s the project’s own figure, not an independent test, but the direction is what matters, and independent users confirm the effect. Pulumi ran a self-verification test where six scenarios used about 5,500 characters through agent-browser versus about 31,000 with Playwright MCP. When every token is billed, a browser that talks in hundreds of tokens instead of thousands changes what an agent can afford to check.

    That self-verification workflow is the use case that made it spread: the agent builds a UI, opens it in a real browser, clicks through it, screenshots it, and fixes what it finds — without a human in the middle. Exploratory testing, form filling, screenshots, and scraping follow from the same loop. Around 2.5 million weekly npm downloads, per a live tracker checked November 8, suggest it’s well past the early-adopter stage. There are 191 contributors and about 1,000 projects using it, per the repo’s own card.

    The part the README doesn’t shout about

    Here’s where the honest picture gets complicated. Every security control in agent-browser is off by default. Domain allowlists, action policies, confirmation prompts, and content boundaries all have to be explicitly enabled — with flags like --allowed-domains, --action-policy, --confirm-actions, and --content-boundaries. An independent review graded the tool a B and put it bluntly: all the guardrails are opt-in. Releases 0.39.3 through 0.41.0, shipped October 25–28, fixed allowlist overrides and saved tokens being exposed to page scripts — with no security advisory published. That’s the kind of fix you want to know about before you hand an agent a browser and walk away.

    Two more practical risks come from independent testing rather than the docs. The default unnamed session is shared with every other agent on the machine and persists across conversations, so one agent can end up driving another agent’s page. And the WebMCP feature is experimental — page-provided tool descriptions are untrusted data, and an agent must not follow instructions it finds in page content. That’s a real attack surface when the agent is browsing arbitrary sites.

    There’s also a reliability caveat worth internalizing: in one controlled test, every command reported success while the setting being changed never actually changed. A click and a screenshot are not proof the outcome stuck. If your agent is verifying its own work, verify the verification — check the result independently, at least until you trust the loop. And a note for readers who’ll point this at other people’s sites: driving a browser as an agent can violate some sites’ terms of service and bot policies. The tool imposes no such limit by default, so the judgment call is yours.

    Who should install it, and who should wait

    Install it if you build with coding agents and you’re tired of being the agent’s eyes. The two-command setup, the MCP server, and the skills integration mean it slots into Claude Code or Cursor workflows with almost no configuration, and the token savings are real enough to change how often your agent checks its work. It’s also the right tool if you want an agent to do exploratory testing or form-filling that Playwright scripts would make tedious.

    Wait — or install it with the guardrails on — if you’re going to point it at anything sensitive. Turn on the domain allowlist, require confirmations for consequential actions, and give each agent its own named session instead of sharing the default. The tool is ten months old and still on 0.x releases, so expect rough edges and read the changelog before upgrading. And if you need Firefox or WebKit support, don’t assume it exists: the docs list Chrome for Testing, the Lightpanda and Obscura engines, Mobile Safari via the iOS Simulator, and cloud providers — nothing else.

    Agent-browser is the kind of tool that looks small and turns out to be load-bearing: a browser reduced to text, priced at free, with the safety left as homework. That combination explains both the 47,000 stars and the caveats. Install it, use it, and read the security flags before you let it loose.

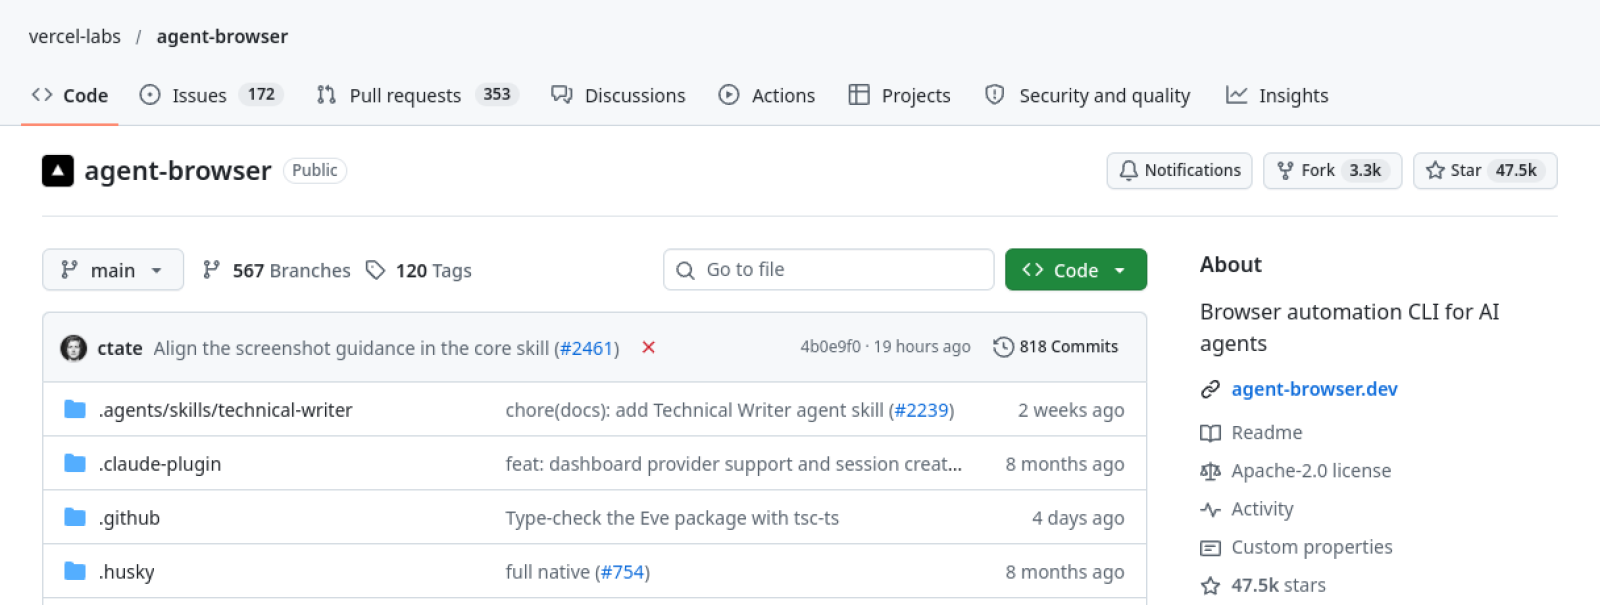
    Featured image: vercel-labs/agent-browser GitHub repo header. Screenshot: github.com/vercel-labs/agent-browser.

    Also today: ChatGPT Images 2.6 adds looping GIFs — and quietly raises the cost of cheap images and Gemini Omni 1.2 Flash goes GA with 15-second clips and a 30% price cut. For more on the agent-skills ecosystem, see our Google Skills and Cloudflare security audit skill coverage.

  • Cloudflare Security Audit Skill: Free AI Code Auditor

    Cloudflare Security Audit Skill: Free AI Code Auditor

    Cloudflare open-sourced the skill behind its AI vulnerability hunter — and the clever bit isn’t the AI, it’s the referee

    Ask an AI to review your code and it will find things. Some of them will be real. Some of them will be confident nonsense. The difference between a useful audit and a pile of false alarms is verification — and that is the whole idea behind cloudflare/security-audit-skill, the repo sitting at number two on GitHub Trending today with 2,088 new stars in a single day and 64,874 stars in total.

    This is not a scanner you run and get a report from. It is a skill: a set of prompts, rules, and validators that turns your coding agent into a security auditor — and then makes a different agent try to disprove everything the first one found. The agent that checks a finding is never the agent that found it. That one rule, borrowed from how human audit teams work, is what makes the whole thing worth your time.

    Where it came from

    The skill is the starting point of Cloudflare’s own internal vulnerability discovery harness, described in the company’s June 18, 2026 blog post “Build your own vulnerability harness.” Engineers took a roughly 450-line skill, ran it against a single repo, tuned it until it surfaced real bugs, and grew it into a fleet-wide system. The numbers from that internal system are striking: 128 repos covered in about six weeks, 20,799 raw candidates narrowed to 7,245 actionable findings sent to engineering teams, and a validation rejection rate that fell from 40 percent to 11 percent as the recon context improved.

    Keep the attribution straight, though: those numbers belong to Cloudflare’s internal fleet system, not to this open-source skill. The repo is the single-repo starting point the harness grew from — a small, focused project with just 14 commits, a README, a license, and a skills folder. It is MIT-licensed, maintained by Cloudflare itself, and it was created on June 18, 2026, the same day as the blog post. What you are downloading is the seed, not the fleet.

    Cloudflare blog hero art for Build your own vulnerability harness
    Cloudflare’s blog post ‘Build your own vulnerability harness’ introduced the internal system this skill seeded. Image: Cloudflare Blog.

    How the six phases actually work

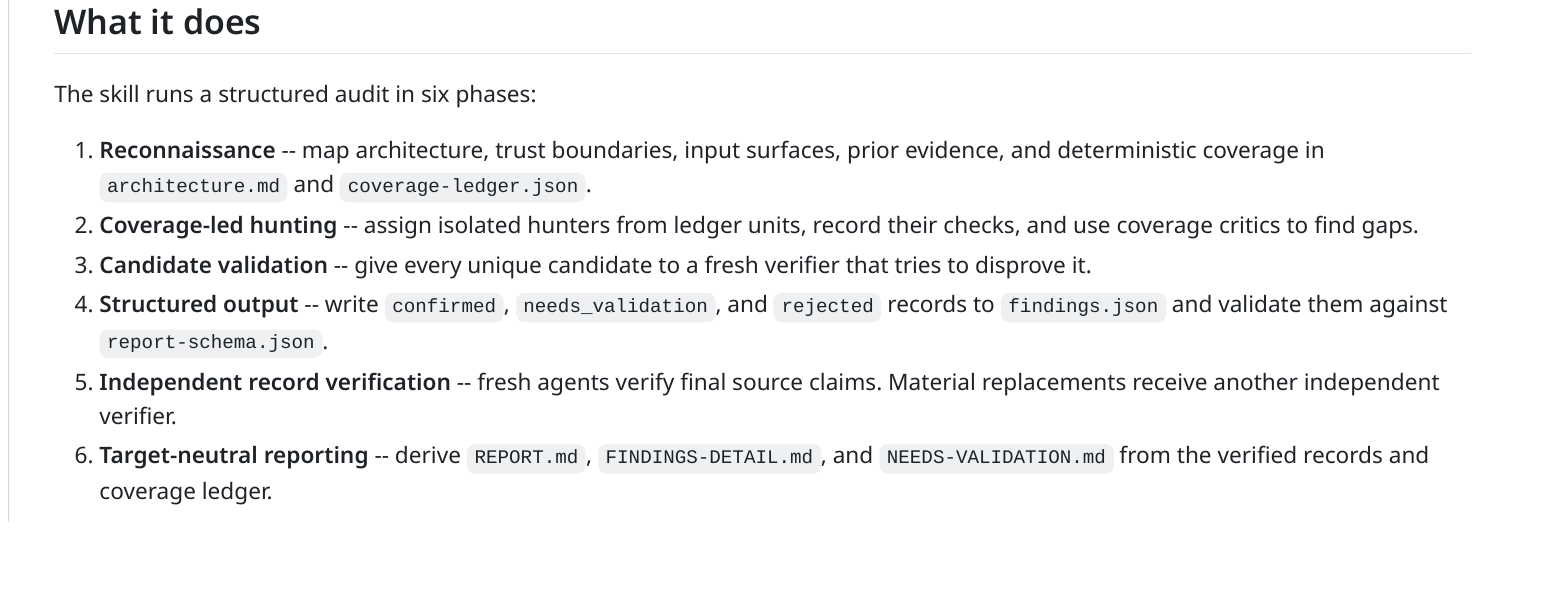
    The skill runs a full audit in six phases, and the structure is the product:

    cloudflare/security-audit-skill README six-phase audit list
    Screenshot: github.com/cloudflare/security-audit-skill — the README’s six-phase audit list.
    1. Reconnaissance — the agent maps your architecture, trust boundaries, input surfaces, and prior evidence into an architecture document and a coverage ledger.
    2. Coverage-led hunting — isolated “hunter” agents are assigned from the ledger, one per attack class, while coverage critics hunt for gaps in the plan itself.
    3. Candidate validation — every unique candidate goes to a fresh verifier agent that tries to disprove it. This is the referee step, and it is the whole point.
    4. Structured output — findings land in a machine-readable findings.json with three verdicts — confirmed, needs_validation, rejected — validated against a schema by zero-dependency Node validators.
    5. Independent record verification — fresh agents re-verify the final source claims, and any material replacement gets another independent verifier.
    6. Target-neutral reporting — human-readable reports are derived from the verified records, not written freehand by the agent that found the bugs.

    The attack coverage is unusually broad, with a dedicated prompt file per domain: core and wildcard attack classes, memory safety and binary/kernel issues, AI and LLM risks including prompt injection, web protocol and auth, client-side and DOM issues, supply chain and release security, cloud and deployment, protocols and messaging, resource exhaustion, data isolation and lifecycle, and desktop, mobile, and local IPC. It audits codebases, APIs, services, CLI tools, libraries, and daemons — any source repo you point it at. Multiple runs against the same repo are additive: later runs target the gaps and revalidate changed code rather than starting over.

    Install it with one command

    Installation uses the Skills CLI:

    npx skills add https://github.com/cloudflare/security-audit-skill \
      --skill security-audit

    Add --global for a user-level install. Then start your coding agent in — or pointed at — the codebase and ask in plain language: “security audit this codebase,” “find security vulnerabilities in ./src,” or “do a security review, output to ~/audits/my-project.” The skill activates automatically when the request matches its trigger, which includes phrases like security audit, find vulnerabilities, and pen-test the code.

    There are two modes. Guidance mode handles security questions and focused reviews without creating files or running the full workflow. Full audit mode, triggered by an explicit audit or pen-test request, runs all six phases and writes artifacts — by default to a folder outside the target repo, under ~/security-audit-skill/<repo-name>/run-<N>. Run profiles let you pick the depth: quick for a bounded first look, standard as the default, and deep for high-stakes or large targets. You can also scope a run to part of a codebase.

    One thing the README does not do is name a specific product. The skill is explicitly agent-neutral: it requires a coding agent with a model that supports tool use and parallel sub-agents, and its instructions use platform-neutral terms. In practice that means tools like Claude Code and Codex, but that compatibility is inferred from the requirement, not stated by Cloudflare — so treat it as “any capable coding agent” rather than an officially supported list.

    What it costs, and the honest limits

    The skill itself is free. MIT license, no Cloudflare account needed, no API keys in the README. The real cost is your coding agent’s model usage, and Cloudflare is candid that fleet-scale scanning “is not cheap”: a full scan of a complex repo can take hours, with the worst run they report taking just over 14 hours. The skill has a built-in cost-budget feature that records the maximum agent invocations in its run metadata, so you can cap a run before it eats your token budget. One user report on Hacker News mentioned spending roughly a million tokens on a medium codebase with nothing to show for it — a single anecdote, not a measured figure, but a useful warning about what an unbounded deep run can cost.

    The limits matter more than the cost. Cloudflare says explicitly that one run finds only about half the bugs repeated runs find, and that findings “skewed toward the simpler and less subtle.” This is a repeatable process, not a checkbox. The company also claims no false-negative rate at all — in its own words, “any claimed recall number is entirely speculative” — so a clean report does not mean a clean codebase. And in Cloudflare’s own pipeline, the auto-fixer never merges code on its own; a human reviews the branch. Findings are leads with evidence, not verdicts, which is exactly why the needs_validation category exists.

    There is one setup requirement worth knowing before you start: anything target-controlled — builds, tests, fuzzers, browsers — must run in an OS-enforced sandbox with no external network, a sanitized allowlisted environment, resource limits, and writes only to assigned scratch paths. Without those controls, the workflow simply refuses to execute target code and records the lead as needs_validation instead. That is the safe default, but it means the skill proves less on a machine where you have not done the sandbox setup.

    Who should try it

    If you maintain an open-source project, run a small team without a dedicated security reviewer, or just want a second pair of eyes on a codebase before a release, this is one of the most practical things to come out of the agent-skills wave. It is free, it installs in one command, and its design — hunters find, referees disprove, nothing ships without a source trace and a working proof-of-concept — is a genuine improvement over asking a chatbot to “check my code for vulnerabilities.”

    Just go in with the right expectations. Run it more than once. Budget the tokens. Read the findings yourself. And remember what Cloudflare itself says: the skill is the starting point, and a clean report is the beginning of an audit, not the end of one.

    Also today: Tesla is winding down Cybertruck production by mid-2027 and Steam free games November 2026 — Payday 3 and Age of Wonders 4 free this weekend. For more on the agent-skills wave, see our Google Skills coverage, Meta Muse Spark Open, and Claude Duet.