How to Transcribe Audio for Free Using Whisper on Kaggle (No Third-Party Uploads)
If you make YouTube videos and need accurate subtitles, you don’t need to upload your audio to some random third-party website. In this tutorial, I’ll show you how I generate word-by-word, sentence-level, and karaoke-style subtitles completely for free, using a Kaggle notebook running OpenAI’s Whisper model — with everything staying under my control.
Why This Approach?
Privacy matters, especially if your audio contains anything sensitive or unfinished. Instead of sending your files to a third-party subtitle service, this method runs entirely inside your own Kaggle notebook. Your audio never leaves a platform you control.
Create a new dataset in Kaggle and upload your audio file to it. This keeps your file private and lets you swap it out later by simply bumping the dataset version.
Step 2: Run the Transcription Script
Here’s the full script. It uses stable-ts (built on top of OpenAI’s Whisper) to transcribe and align your audio, then exports three types of subtitle files.
import os
import glob
os.system('pip install -q stable-ts')
import stable_whisper

WHISPER_MODEL = 'large'
LANGUAGE      = 'en'
OUTPUT_DIR    = '/kaggle/working'

audio_files = (
    glob.glob('/kaggle/input/**/*.mp3', recursive=True) +
    glob.glob('/kaggle/input/**/*.mp4', recursive=True) +
    glob.glob('/kaggle/input/**/*.wav', recursive=True) +
    glob.glob('/kaggle/input/**/*.m4a', recursive=True)
)
if not audio_files:
    raise FileNotFoundError('No audio found in /kaggle/input')

AUDIO_FILE = audio_files[0]
print(f'Using: {AUDIO_FILE}')

import torch
device = 'cpu'
if torch.cuda.is_available():
    try:
        cap = torch.cuda.get_device_capability(0)
        if cap >= (7, 0):
            device = 'cuda'
        else:
            print(f'GPU capability {cap} too old, using CPU instead.')
    except Exception as e:
        print(f'GPU check failed ({e}), using CPU instead.')

model = stable_whisper.load_model(WHISPER_MODEL, device=device)
result = model.transcribe(AUDIO_FILE, language=LANGUAGE, word_timestamps=True, verbose=False)

base = os.path.splitext(os.path.basename(AUDIO_FILE))[0]
word_srt = os.path.join(OUTPUT_DIR, f'{base}_word_level.srt')
result.to_srt_vtt(word_srt, word_level=True, tag=('', ''))

sent_srt = os.path.join(OUTPUT_DIR, f'{base}_sentence.srt')
result.to_srt_vtt(sent_srt, word_level=False)

print('Done! Files saved to /kaggle/working')
Step 3: Pull Your Output
Once the kernel finishes running, use the Kaggle API to pull your output files directly to your computer:
Bring the exported SRT files into your video editor (CapCut, Premiere, etc.) to add synced captions to your video.
Wrap-Up
That’s it — accurate, free subtitles without ever handing your audio to a third-party website. If you found this useful, subscribe for more tutorials like this.
If you create cartoon content, YouTube thumbnails, kids' educational videos, or any kind of visual assets, you've probably run into the same wall: AI image generators are either expensive, rate-limited, or watermark your output. In this tutorial, I'll show you how to set up a **completely free AI image generator** using Kaggle's GPU notebooks and Stable Diffusion XL — and how to generate images in **bulk batches** with just a list of prompts.
By the end of this guide, you'll have a reusable notebook where you can drop in 10, 20, or even 50 prompts, hit run, and walk away with a folder of finished images — zipped and ready to download.
Why Kaggle for AI Image Generation?
Most free AI image generator tools online limit you to a handful of images per day, strip out resolution, or require a subscription for anything beyond basic use. Running Stable Diffusion locally is an option, but it requires a powerful GPU — something most laptops simply don’t have.
Kaggle solves this elegantly. Every Kaggle account comes with free access to NVIDIA T4 GPUs, with roughly 30 hours of GPU time per week at no cost. That’s more than enough to generate hundreds of high-quality images weekly, especially if you’re working on a content calendar that needs a steady stream of visual assets.
The setup runs entirely in your browser through a Jupyter-style notebook. No installation on your computer, no driver issues, nothing to maintain.
What You’ll Need
A free Kaggle account (sign up at kaggle.com if you don't have one)
- About 15 minutes for initial setup
- A list of prompts for whatever images you want to create
That's it. No credit card, no API keys, no subscriptions.
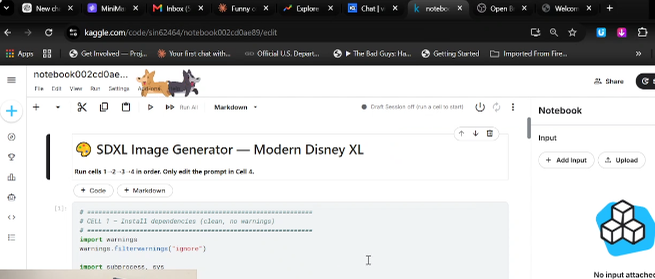
Create a New Notebook with GPU Enabled
Once you're logged into Kaggle, head to the Notebooks section and create a new notebook. Before doing anything else, you need to enable GPU access:
1. Open the notebook settings panel (usually on the right side)
2. Under "Accelerator," select **GPU T4 x2** (or whichever T4 option is available)
3. Save the settings
This step is critical. Without enabling the GPU, the notebook will try to run everything on CPU, which would make image generation painfully slow — we're talking minutes per image instead of seconds.
Install the Required Libraries
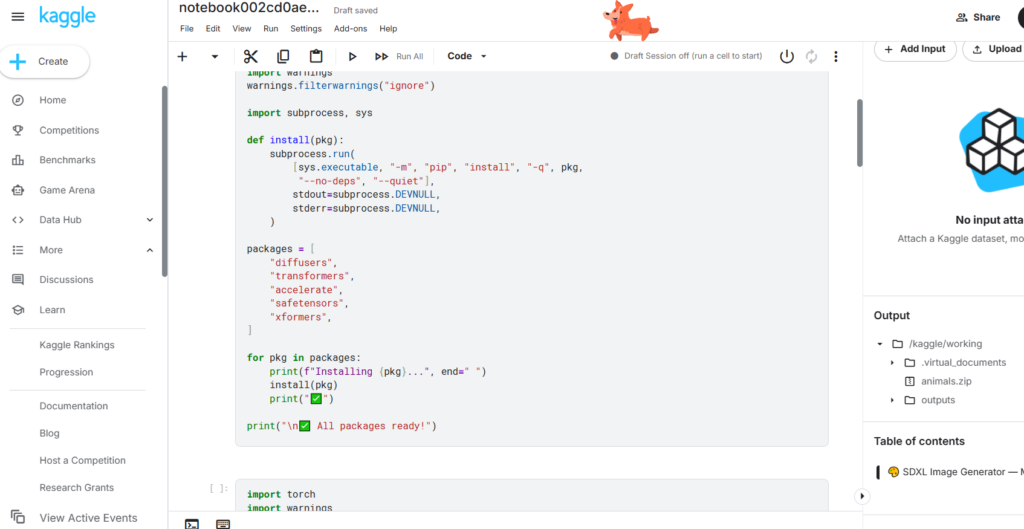
The first cell in the notebook handles installing everything needed to run Stable Diffusion. This includes the Diffusers library (which handles the actual image generation pipeline), Transformers, Accelerate for performance optimization, and a few supporting packages.
This installation step typically takes under a minute. One thing worth knowing: Kaggle notebooks come pre-loaded with a lot of data science packages, and you might see some dependency warning messages during installation. These are harmless — they're conflicts between Kaggle's pre-installed packages and the new ones, but they don't affect the image generation pipeline at all.
Load the Image Generation Model
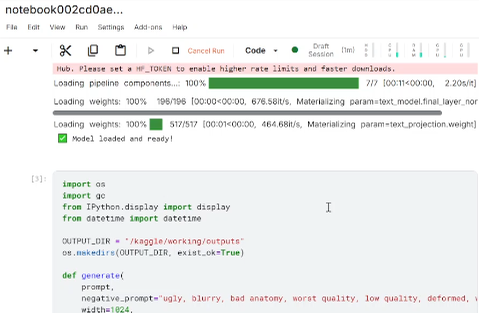
This is where the magic happens. The second cell loads the actual AI model — in this case, we're using Playground v2.5, a Stable Diffusion XL model known for producing vibrant, high-quality results that work well for both realistic and stylized/cartoon imagery.
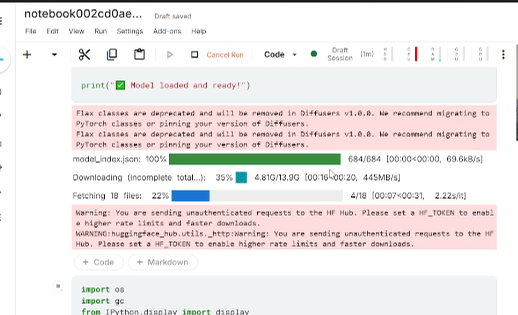
The first time you run this cell, it will download the model files, which total a few gigabytes. This download happens once per session — if your notebook restarts, you'll need to run this cell again, but Kaggle often caches it for faster reloads.
A few optimizations are baked into this step that are worth understanding even if you're not technical:
Memory-efficient attention** allows the GPU to process images using less memory, which means you can generate larger images without running into "out of memory" errors.
VAE slicing and tiling** breaks the final image decoding step into smaller chunks. This is what allows you to run a long batch of images back-to-back without the GPU running out of room — a problem that commonly occurs when generating many images in sequence without this optimization.
Once this cell finishes, you'll see a confirmation message that the model is loaded and ready.
Set Up the Generator Function
The third cell defines a reusable function that handles the actual image creation process. Think of this as the "engine" — you won't need to touch this cell directly, but it's what powers everything that follows
This function takes care of several things automatically
Generating the image based on your prompt
- Applying a "negative prompt" — essentially a list of things you don't want in the image, like blurry results, distorted anatomy, or watermarks
- Saving each image with a unique filename based on the time it was created
Displaying the image directly in the notebook so you can preview it immediately
Cleaning up GPU memory after each image, which prevents crashes during long batch run
You only need to run this cell once per session.
Add Your Prompts and Generate in Bulk
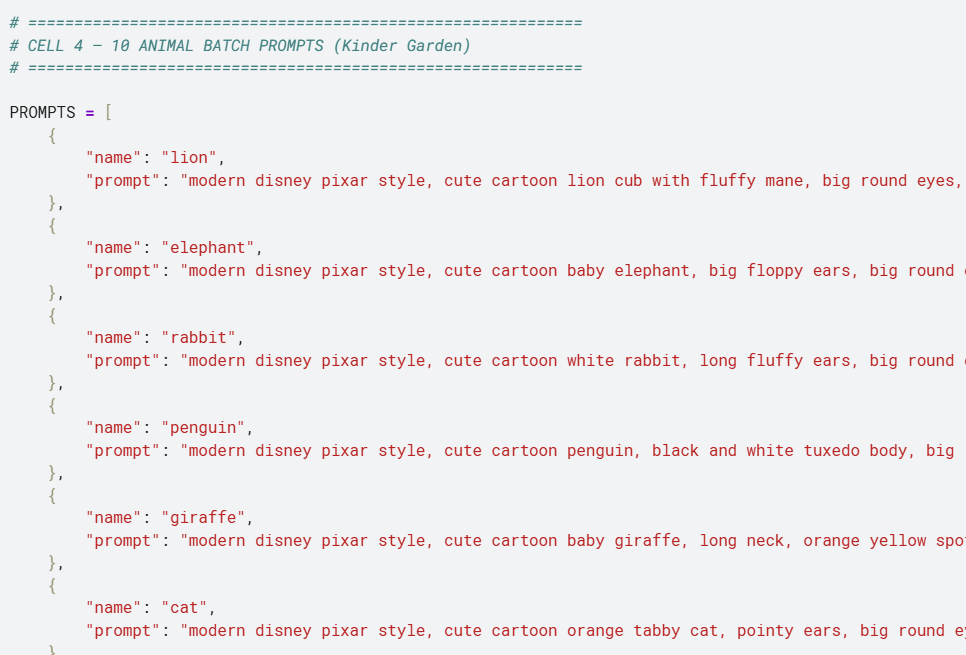
This is the cell you'll actually edit every time you want new images. It contains a simple list where each entry has two parts: a name (used for the filename) and a prompt (the description of what you want generated).
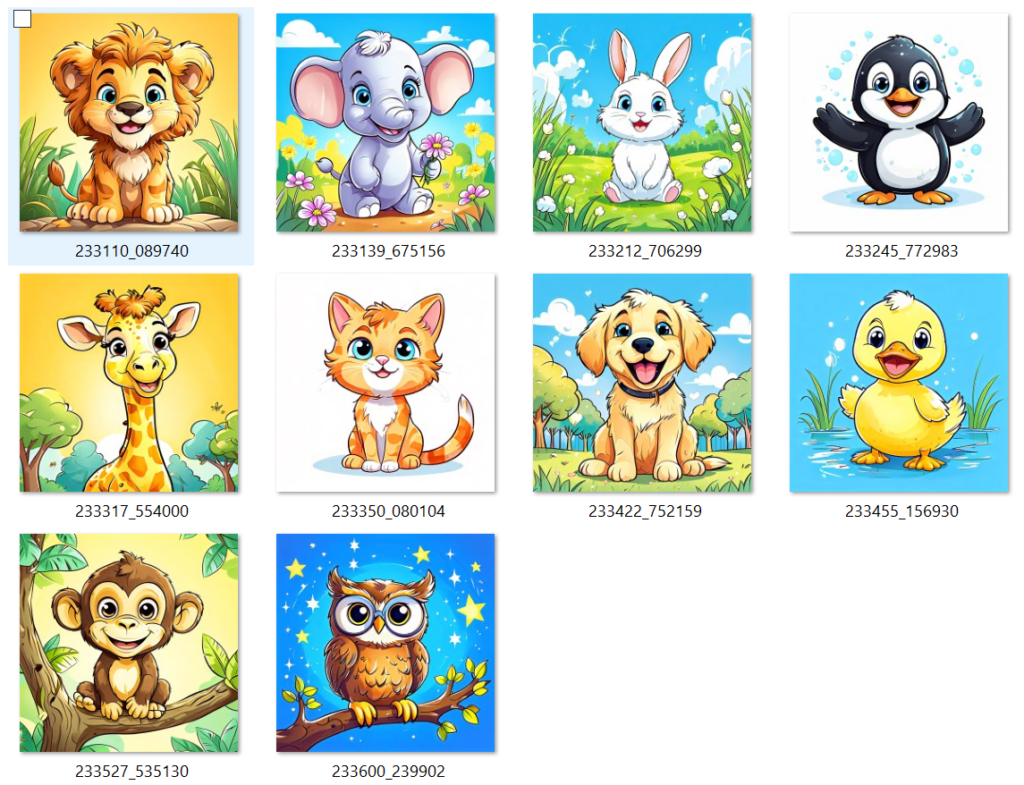
or example, if you’re creating a set of cartoon animal images for a kids’ educational video, your list might include entries for a lion, an elephant, a rabbit, and so on — each with a detailed prompt describing the art style, the animal’s pose, expression, and background.
Download Everything as a ZIP File
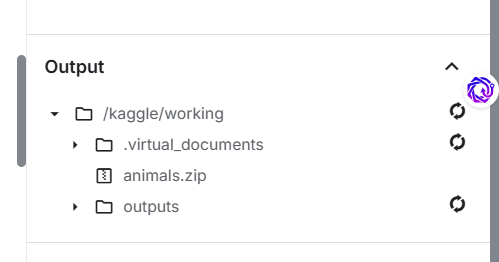
Once your batch finishes, the final cell bundles every generated image into a single ZIP file and provides a direct download link right inside the notebook. Click the link, and the entire batch downloads to your computer in one go — no need to right-click and save each image individually.
With this setup, you now have access to a genuinely free, GPU-powered image generation pipeline that can produce dozens of images per session without any subscription costs or daily limits beyond Kaggle's generous weekly GPU allowance. Whether you're building out a content calendar for a YouTube channel, creating thumbnail assets, or just experimenting with AI art, this notebook gives you a solid, repeatable foundation.